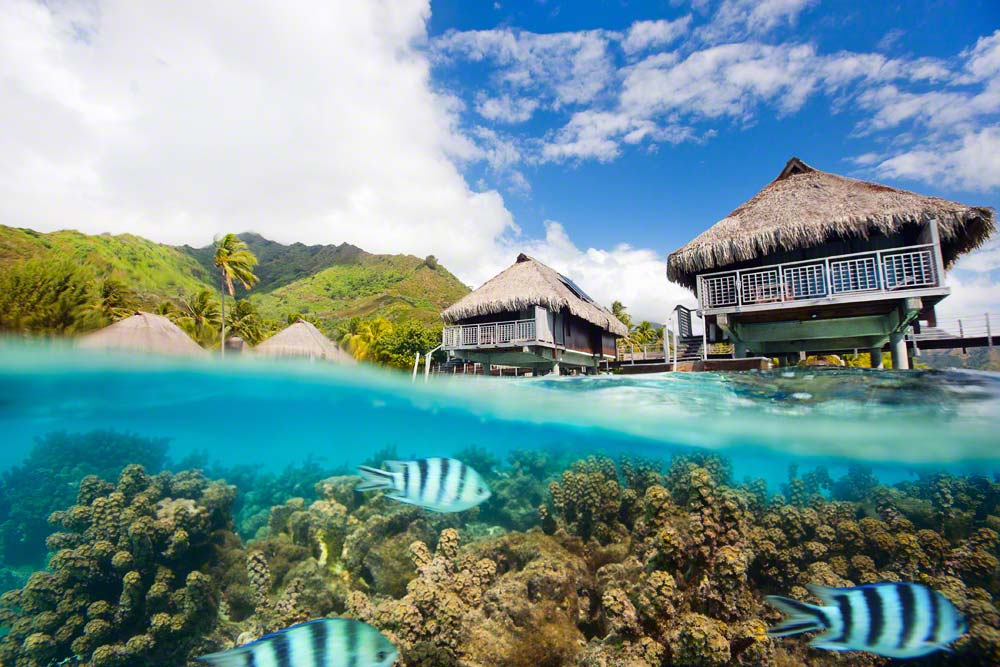
Underwater life at Hilton Moorea
We have received quite a few requests from our readers and Instagram followers, asking us to write a post about how we shoot underwater/over-under images, and we’ve heard you. Here we go!
As you might know, we travel to tropical locations quite often. When we started traveling, we used to capture the tranquility of the beaches from the ground level, we always wanted to take photos of the beautiful underwater life too. Though we have never tried diving, all of us enjoy snorkeling very much.
The Canon Ixus X-1 compact film camera was our first underwater camera that we bought around year 2004. Unfortunately, we were unable to find any images taken with it for this post. Our underwater photography endeavors began in 2004 with this camera.
Seychelles with Ewa-Marine
Our second underwater camera was the Canon PowerShot D10 that we purchased for our son. The camera was rugged, dustproof and waterproof. Perfect for our active and carefree explorers. Around the same time, we were already using a Canon 5D DSLR for our photo adventures and decided to try the cheapest underwater solution we could find on the market: Ewa-Marine U-BXP100.
Specifications for Ewa-Marine:
Model: U-BXP100
Depth rating: 50m
Port: flat port for lenses with 72mm filter diameter (82mm add-on extension)
Weight with camera: ~2.4kg
Buoyancy: Positive
This housing is very simple, just a thick plastic bag with a flat port. The Ewa-Marine is light and cheap, and it is easy to handle and to install a camera. However, it was very difficult to rotate any control wheels or press buttons due to the underwater pressure.
Hawksbill turtle, Seychelles
During our vacation to Seychelles, we thought it would be nice to have more context in the photos. We wanted to capture the beautiful underwater environment with the magnificent boulders of Anse Source d’Argent. We tried and failed. It was nearly impossible to shoot what we wanted with the lens and port combination provided by the Ewa-Marine. A large surface area together with positive buoyancy made it quite difficult to snorkel or free dive with the U-BXP100 camera bag.
Tahiti with SEA&SEA
For the next trip, we did some research and decided to try proper housing before buying. On the way to Tahiti, we stopped in LA and rented a SEA&SEA MDX-MKIII housing for the Canon 1DS Mk III from AB Sea Photo. The owner was super friendly and gave us lots of tips on how to use the housing.
Overwater photographer, aka Alex, with SEA&SEA housing.
Specifications for SEA&SEA:
Model: SEA&SEA MDX-MKIII
Port: 8” Optical dome port with extension ring
Depth rating: 60m
Weight with camera: 6.7kg
Buoyancy: neutral, slightly negative
We loved this housing. It is solidly built, provides access to all buttons, has plenty of accessories, and is neutrally or slightly negatively balanced in seawater. It was also easy to install and remove the camera. One drawback is the weight, especially if you use bigger cameras like the 1DS Mk III. Shooting split images or just walking around with the housing will tire your arms and shoulders very fast. Here are a few images we took during our trip to Tahiti.
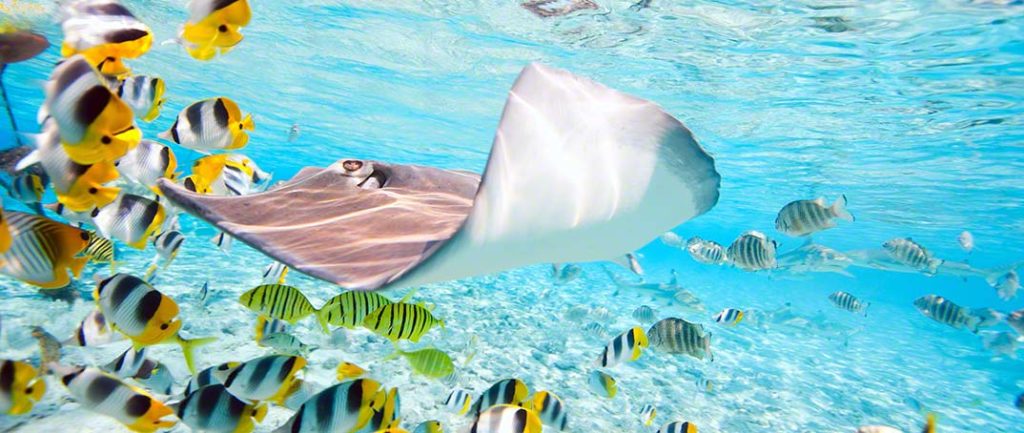
Beautiful stingrays, sharks and reef fish at Bora Bora
Split underwater photography at Ninamu, Tahiti.
Bahamas, Palau, BVI, USVI, Cook Islands and Maldives with Ikelite
The Ikelite housing for the Canon 5D Mk II was our next purchase, which we kept for several years. It was an affordable solution compared to the offerings of Aquatica, Subal, and SEA&SEA. We had just one port and an 8” dome that we used with a Canon 16-35 2.8L II lens most of the time. The only problems with this housing were its weight, caused by the thick polycarbonate material it’s made out of, and a complicated lens installation procedure. First, you need to install the camera without the lens. Then you install the zoom gears, install and secure the extension port, install the rubber zoom ring around the lens, remove the camera cap and lens cap, and install the lens into the extension port. Only then can you attach the dome to the extension port. Oh my, you better watch this if you are interested.
Specifications for Ikelite:
Model: Ikelite Canon 5D MK II housing
Port: 8” Dome Kit For Lenses Up To 5.1 Inches
Depth rating: 60m
Weight with camera: 4.3kg
Buoyancy: negative
Underwater photos of swimming pigs of Exuma, Bahamas.
Underwater / split images of magnificent boulders of BVI. Having fun with Alex’s underwater housing.
Yikes, jellyfish lake in Palau
Maldives and Cambodia with AquaTech
As we mentioned at the beginning of the post, we are not divers. To be honest, we don’t really like the complexity associated with it. We decided that there was no point in keeping an underwater housing rated for a depth of 60m. At the end of 2015, we switched to the AquaTech brand. AquaTech markets their products as “sport housings” that are intended to be used in shallow water and surface-level conditions. The housings can be used to shoot surfing, snorkeling, and other water sports as well as split-shot underwater photography. AquaTach underwater housings are light, are easy to use and install the camera, and have an amazing number of accessories and ports. The only problem is limited access to camera controls; however, most of the functions can be accessed through the custom menu (Q) button. We use a Canon 5DS camera with the Elite 5D3 housing because the Canon 5DS provides better menu customization options.
Can you spot little fella? Can’t take over / under images without him.
Specifications for AquaTech:
Model: Elite 5D3 housing
Port: 8” PD-85 lens port with P-70 EX extension ring
Depth rating: 10m
Weight with camera: 4kg
Buoyancy: positive
Dunk testing new Aquatech underwater housing with Mia.
Testing Sigma 35 1.4 lens with Aquatech housing.
Beautiful underwater reef fish of Maldives.
Underwater housings are also useful for other kinds of photography when a camera needs to be protected from water.
Having fun on the beach. Who makes more droplets on the dome, wins!
Ballerina silhouette, taken with 70-200 2.8 in Aquatech housing.
Tickets, camera, housing. All ☑
Huh, sorry for the boring history lesson 😉 On to what you are most interested in. This section is about tips and tricks. We aren’t professionals, so the tips we can give you might not be valid in the professional world. All we have learned over the past few years has evolved through trial-and-error improvements.
Before use, don’t forget to test underwater housing in the water. We usually do water testing in the pool, first without and then with the camera. Sometimes, the kids “help” us to check whether all the controls work as expected.
Who scratches dome first, definitely wins 😀
How to get sharp images
To get sharp and properly exposed split images you would need:
- Calm and clear water.
- Good lighting conditions—the more light the better.
- To expose to the point of interest. We prefer exposing to the bottom part, since an overexposed sky can be easily recovered in post processing.
- A small aperture (f8–f16).
- To use a wide-angle lens that is 16mm or less.
- As big of a dome as possible. A smaller dome will require a smaller aperture.
- To be farther away from the subject so that the lens will use the hyperfocal distance.
While some photographers use split-field or graduated ND filters, this solution does not fit our style since we can’t switch to the fully underwater or over-water modes without removing the dome and the lens filter.
How to remove water drops from the dome
Another common problem with split-shot photography is water drops on the dome. We didn’t know during our trip to Tahiti that this could be such a big problem, and, unfortunately, many images were ruined. Now we always carry a soft sponge attached to the housing for quick and easy droplet removal. Did you notice it in the image of our AquaTech underwater gear?
How to white balance split underwater images
We rarely use flash when taking split underwater images, therefore, the top and bottom parts sometimes have different color temperatures, as the water absorbs red, orange, and yellow wavelengths. Some photographers use red filters to adjust the white balance. We decided to take an easier path. Shoot RAW, and apply different white balance temperatures to the top and bottom images during post processing.
Here are few tips and a brief overview of our development process. We use Adobe products, so Lightroom for RAW image processing and Photoshop for final editing.
- Shoot RAW.
- Adjust image settings to your liking in your favorite RAW image processing application.
- Make sure the color balance for the top part of the image is correct, and develop the image to TIFF or JPEG.
- Make a virtual copy (or equivalent), adjust the color balance for the bottom of the image, and develop the image to TIFF or JPEG.
- Stack the two images in your favorite photo editing application in any order. For example, the image with the correctly balanced top part would be on top layer.
- Add a mask to the top layer and mask out the underwater part of the image.
- Merge everything and adjust things like levels or shadows/highlights settings.
Left – WB sky. Right – WB underwater.
Two images merged together.
If you shoot in shallow water with white sand, for example, on sandbanks, you will rarely need to apply different white balance settings to the top and bottom parts of an image.
Woohoo, no need to color balance underwater part. Maldives.
If you are an amateur or hobbyist photographer like us, we hope you found this post interesting. If you think we need to add more information or examples, please don’t hesitate to contact us or leave a comment at the bottom of the page.

